
How to use this page
- Work through Tasks 1–8 and tick each step as you complete it. Your progress and answers are saved in this browser automatically.
- Wherever you see
 Screenshot, capture your lab progress and attach the screenshot right on this page. Add a short explanation for each. For better visibility, don't take screenshots in dark mode.
 - Answer the Task 9 questions, then use Print / Save as PDF to export your answers and screenshots as one submission file.
- Do not delete the resources in this lab — they are required for subsequent labs. Stop your VMs at the end to minimize costs.
Lab Objectives reference
Lab scenario: you plan to implement an Azure Virtual Desktop environment and need to use custom virtual machine images when deploying Azure Virtual Desktop session hosts.
Lab dependencies: Lab 01 (Deploy host pools and session hosts by using the Azure portal) and a Microsoft Entra user account (Odl_user) with the Owner role in the Azure subscription assigned by the school.
In this lab, you will:
- Task 1 — Register required resource providers 10 pts
- Task 2 — Create a user-assigned managed identity 10 pts
- Task 3 — Create a custom Azure role-based access control (RBAC) role 10 pts
- Task 4 — Set permissions on the host image provisioning-related resources 10 pts
- Task 5 — Create an Azure Compute Gallery instance and an image definition 10 pts
- Task 6 — Create a custom image template 10 pts
- Task 7 — Build a custom image 10 pts
- Task 8 — Deploy session hosts by using a custom image 10 pts
- Task 9 — Summary Questions 20 pts
Task 1: Register required resource providers 10 pts
-
Note: if prompted, in the Getting started pane, in the Subscription drop-down list, select the name of the Azure subscription you are using in this lab and then select Apply.
-
Register-AzResourceProvider -ProviderNamespace Microsoft.DesktopVirtualization
Register-AzResourceProvider -ProviderNamespace Microsoft.VirtualMachineImages
Register-AzResourceProvider -ProviderNamespace Microsoft.Storage
Register-AzResourceProvider -ProviderNamespace Microsoft.Compute
Register-AzResourceProvider -ProviderNamespace Microsoft.Network
Register-AzResourceProvider -ProviderNamespace Microsoft.KeyVault
Register-AzResourceProvider -ProviderNamespace Microsoft.ContainerInstanceNote: do not wait for the registration to complete. This might take about 5 minutes.
Task 2: Create a user-assigned managed identity 10 pts
-
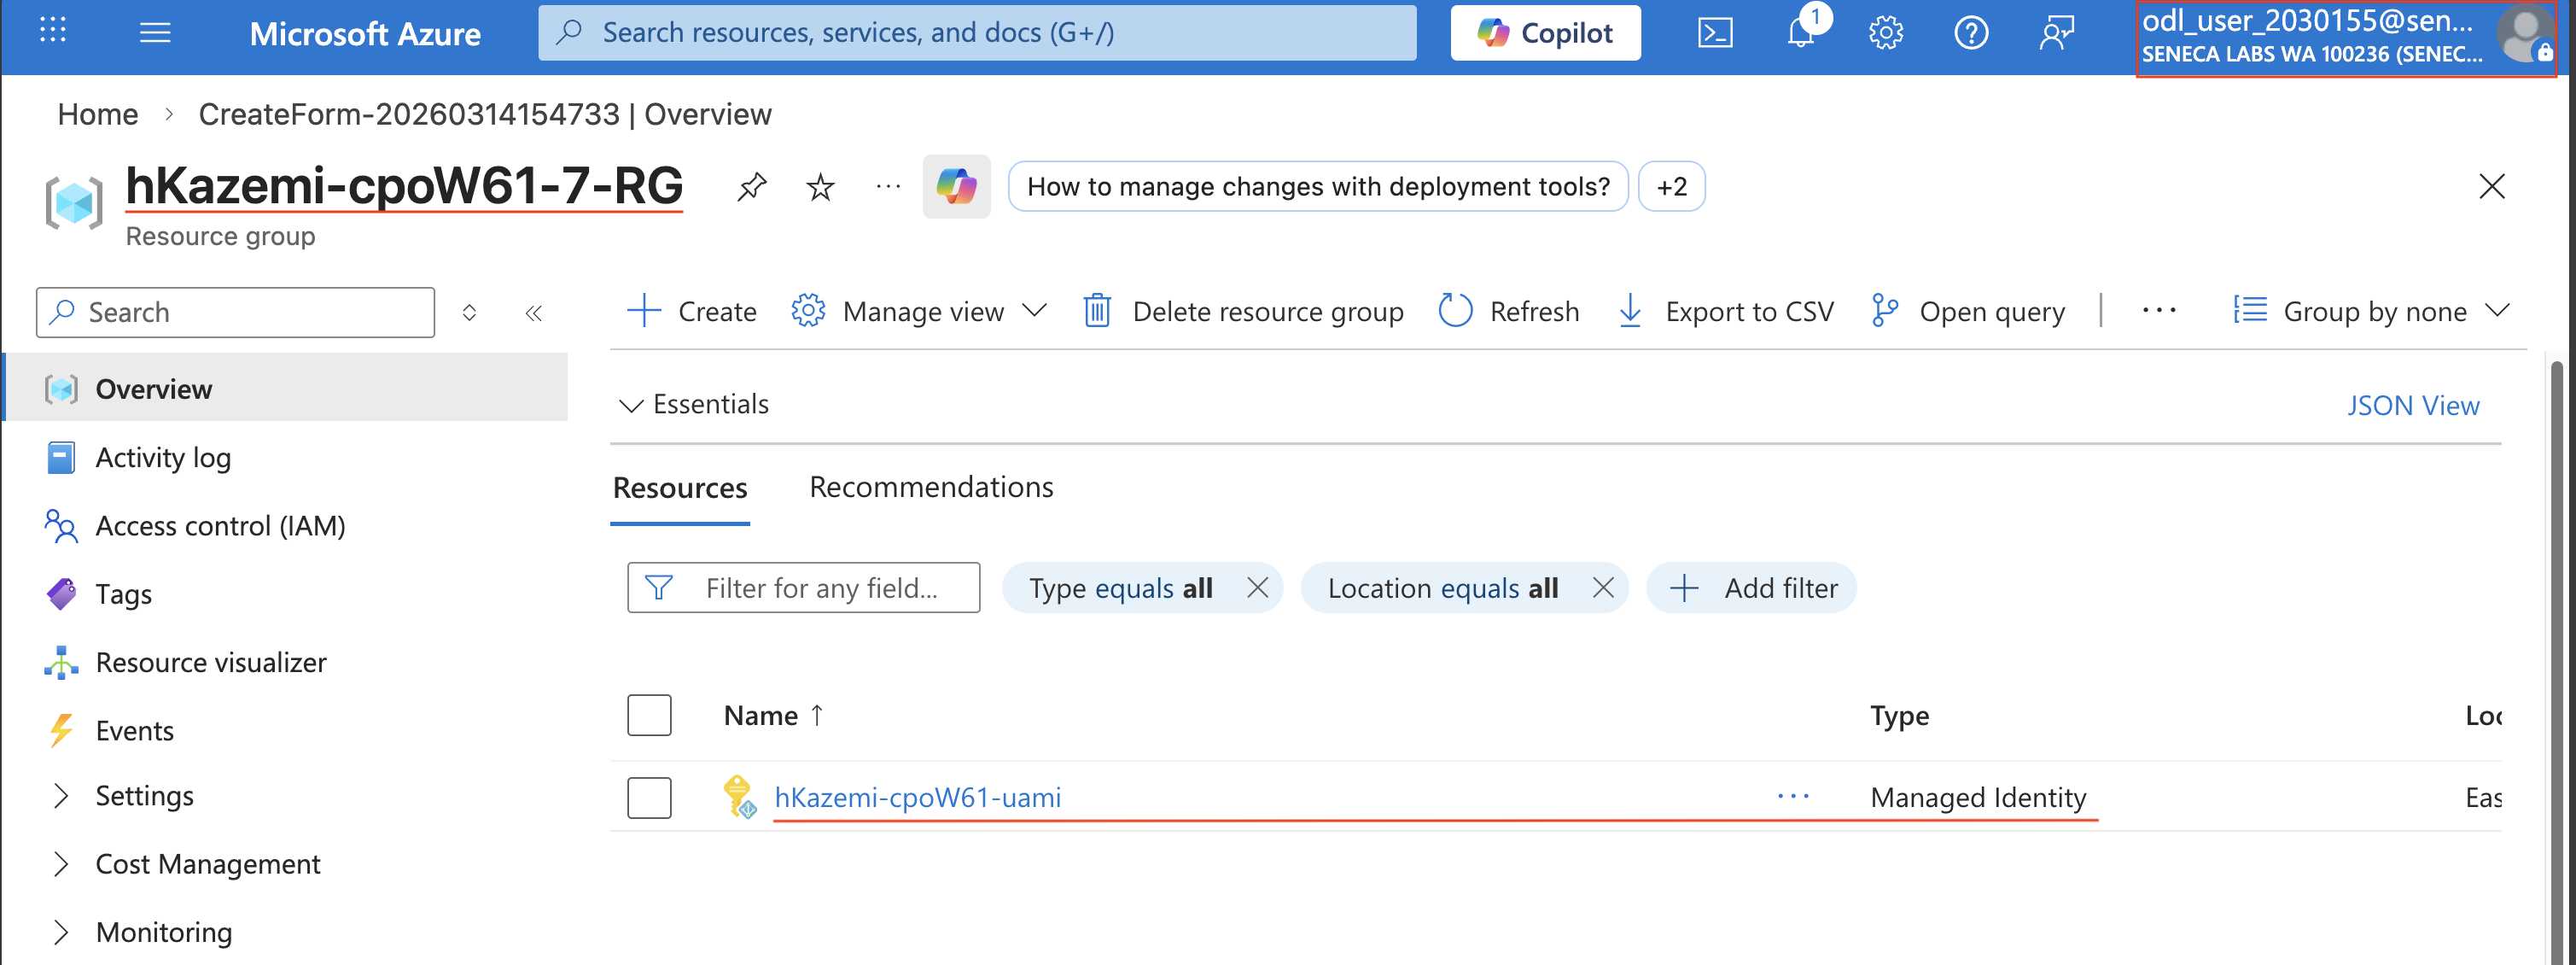
Setting Value Subscription the name of the Azure subscription you are using in this lab Resource group the name of a new resource group <sName>-cpoF67-7-RGRegion the name of the Azure region where you want to deploy your Azure Virtual Desktop environment Name <sName>-cpoF67-uami - Screenshot must show your Odl_user account, the <sName>-cpoF67-uami user-assigned managed identity you created
Task 3: Create a custom Azure role-based access control (RBAC) role 10 pts
Note: the custom RBAC role will be used to assign appropriate permissions to the user-assigned managed identity created in the previous task.
-
$subscriptionId = (Get-AzSubscription).Id
-
$jsonContent = @"
{ "Name": "Desktop Virtualization Image Creator (<sName>)", "IsCustom": true, "Description": "Create custom image templates for Azure Virtual Desktop images.", "Actions": [ "Microsoft.Compute/galleries/read", "Microsoft.Compute/galleries/images/read", "Microsoft.Compute/galleries/images/versions/read", "Microsoft.Compute/galleries/images/versions/write", "Microsoft.Compute/images/write", "Microsoft.Compute/images/read", "Microsoft.Compute/images/delete" ], "NotActions": [], "DataActions": [], "NotDataActions": [], "AssignableScopes": [ "/subscriptions/$subscriptionId", "/subscriptions/$subscriptionId/resourceGroups/<sName>-cpoF67-72-RG" ] }
"@ -
$jsonContent | Out-File -FilePath 'CustomRole.json'
-
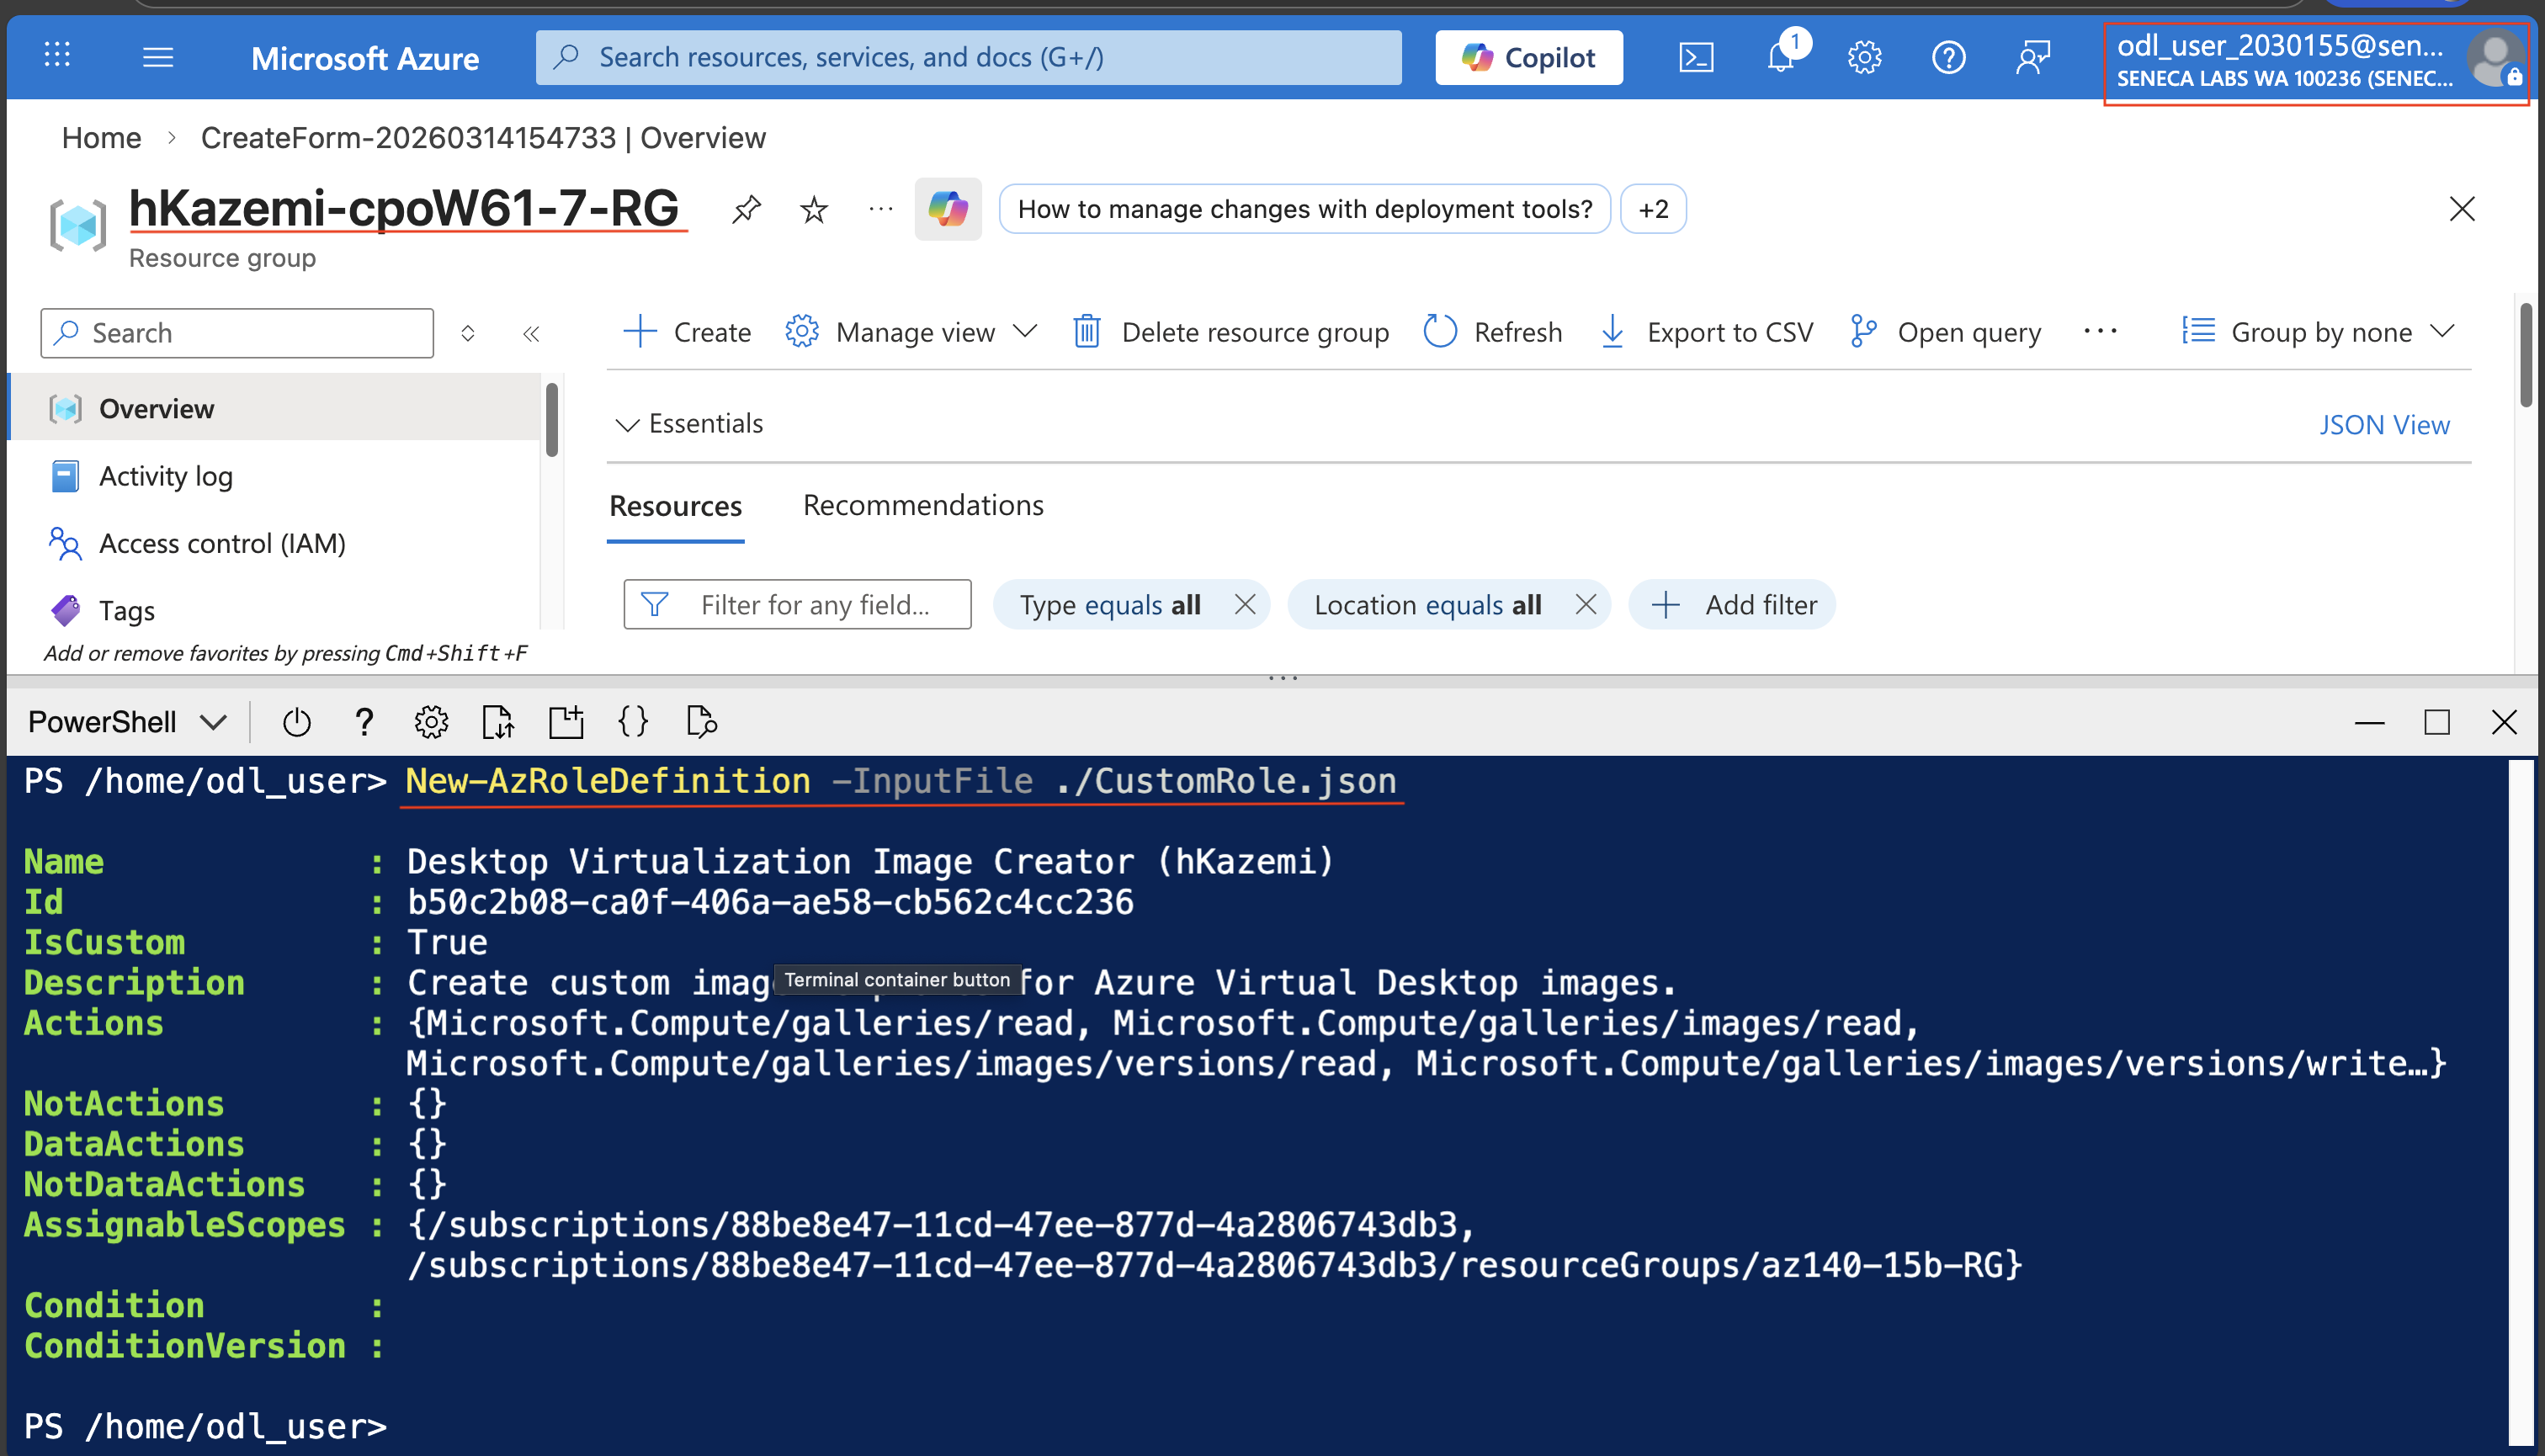
New-AzRoleDefinition -InputFile ./CustomRole.json
- Screenshot must show your Odl_user account, the Cloud Shell with the Desktop Virtualization Image Creator custom role created via New-AzRoleDefinition
Task 4: Set permissions on the host image provisioning-related resources 10 pts
-
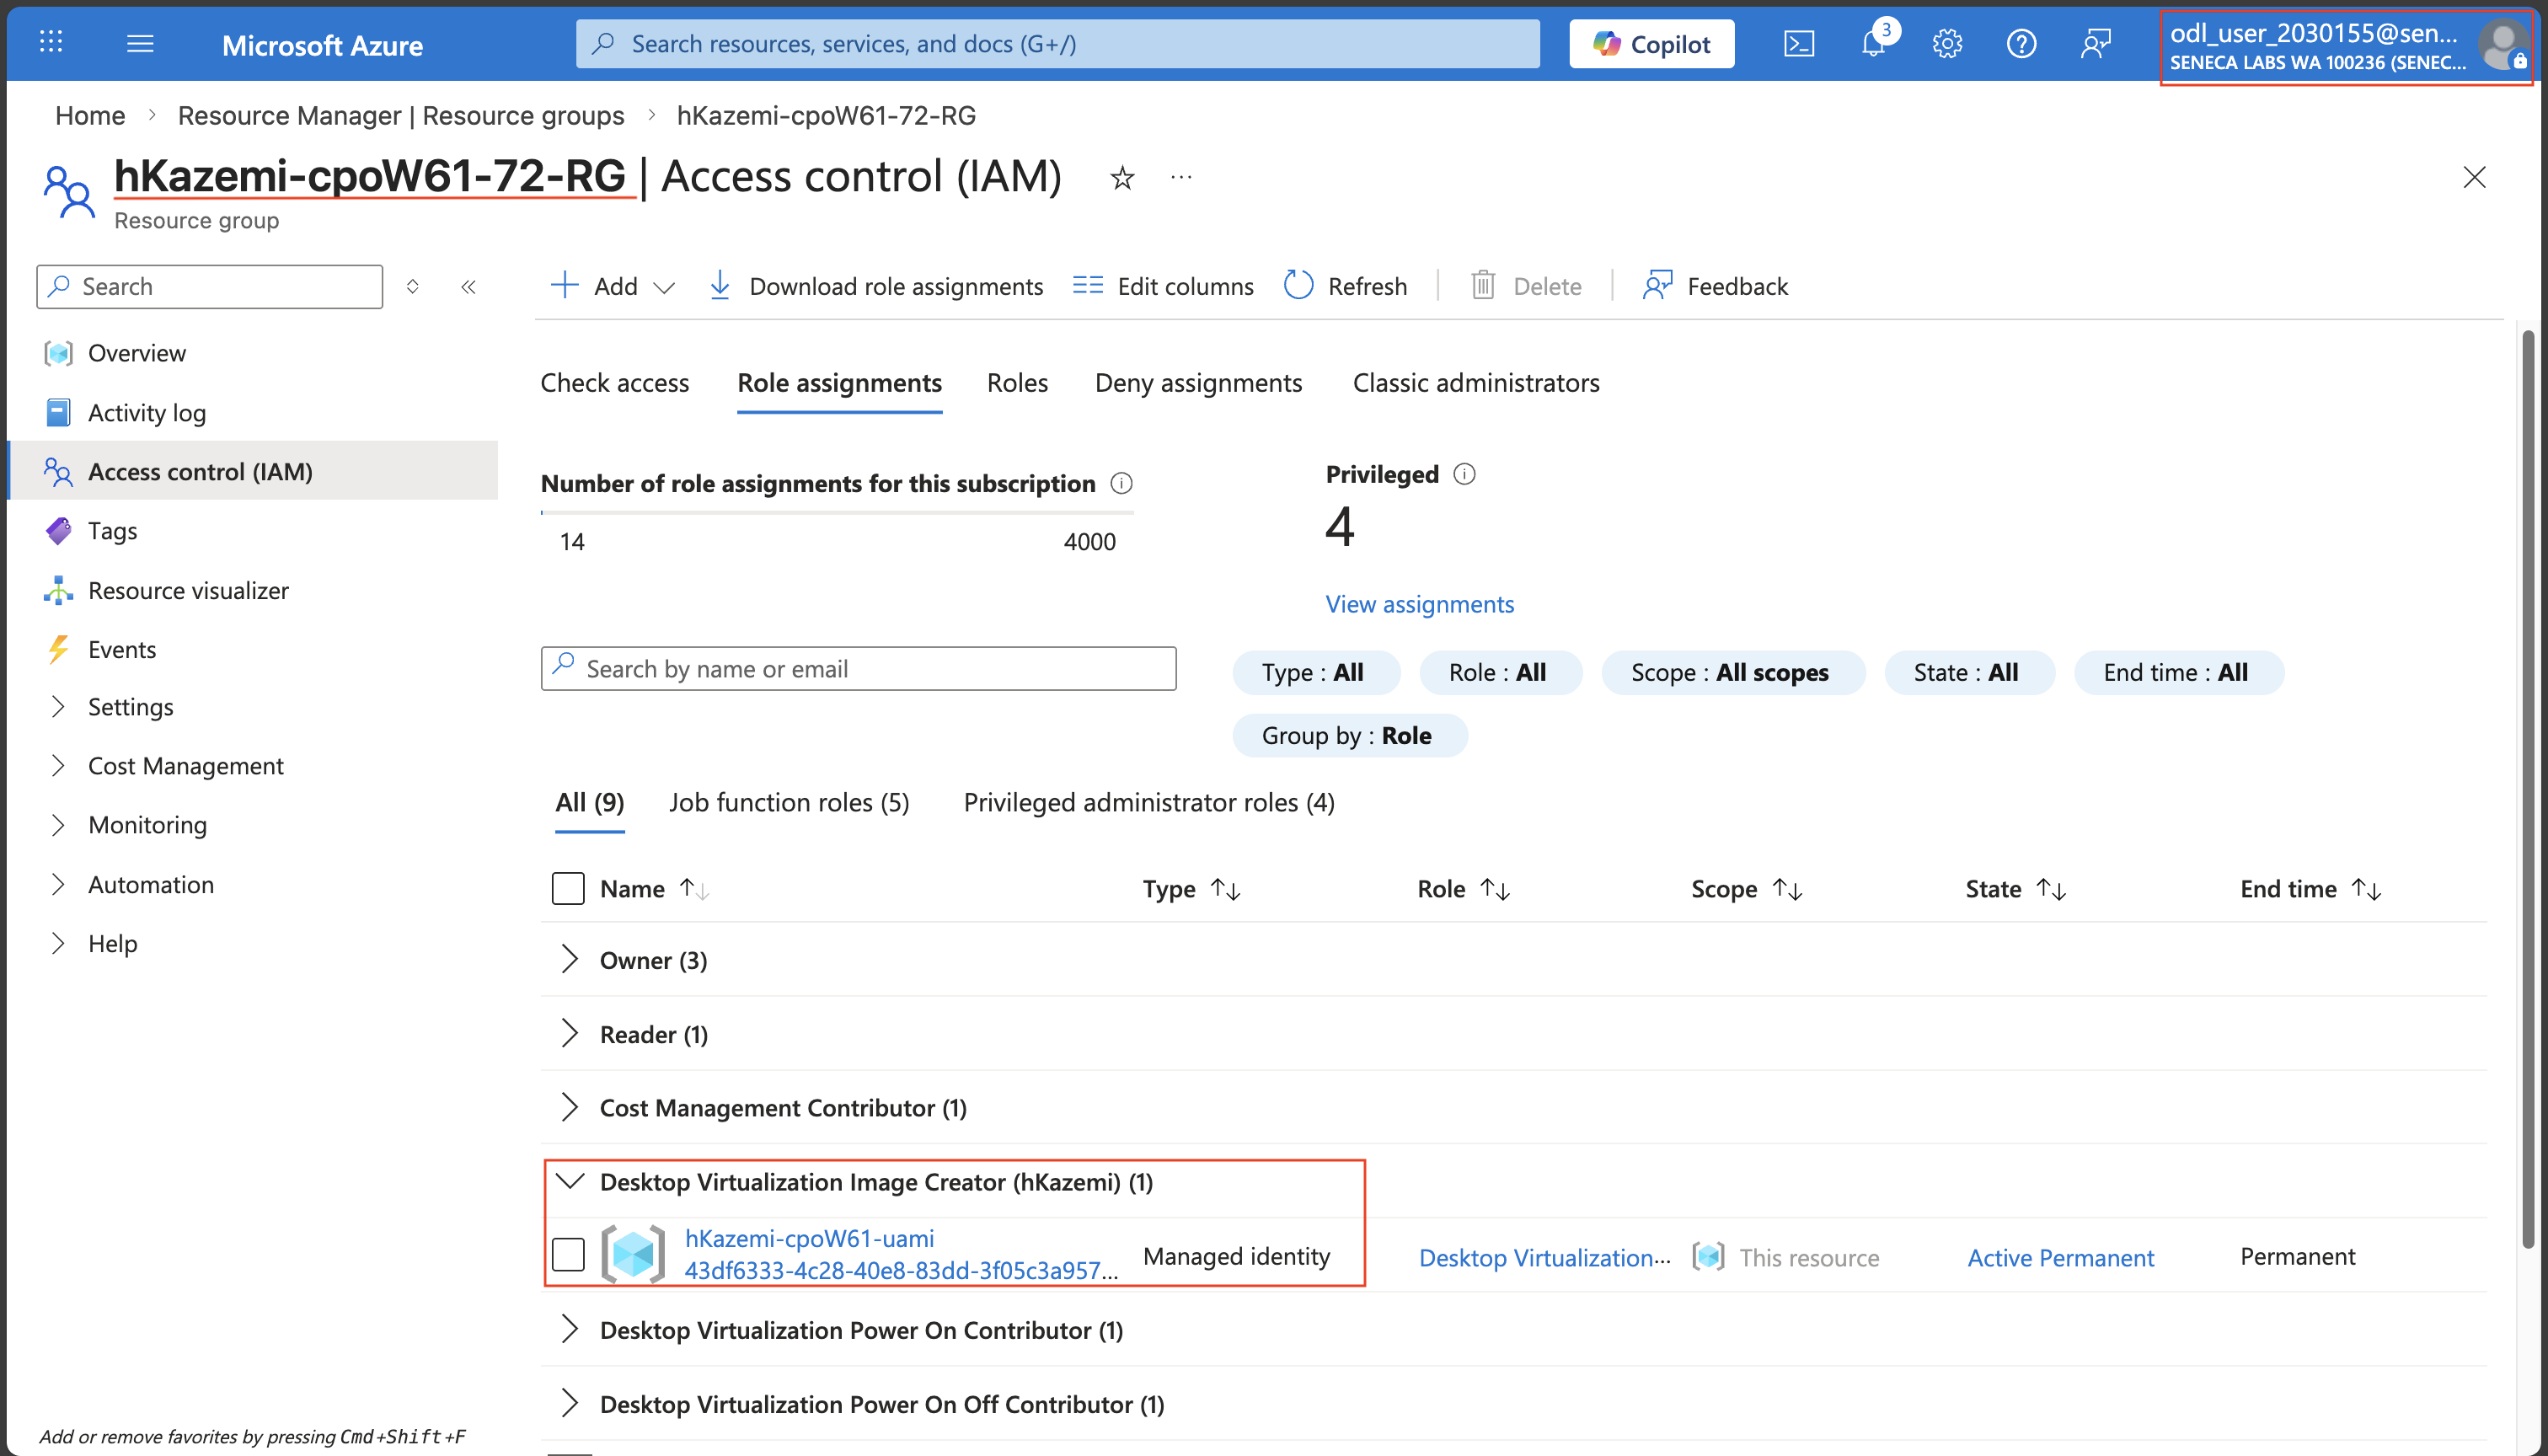
Setting Value Subscription the name of the Azure subscription you are using in this lab Resource group the name of a new resource group <sName>-cpoF67-72-RGRegion the name of the Azure region where you want to deploy your Azure Virtual Desktop environment - Screenshot must show your Odl_user account, the Desktop Virtualization Image Creator role assignment to <sName>-cpoF67-uami on <sName>-cpoF67-72-RG
Task 5: Create an Azure Compute Gallery instance and an image definition 10 pts
-
Setting Value Subscription the name of the Azure subscription you are using in this lab Resource group <sName>-cpoF67-72-RGName <sName>_cpoF67_GalleryRegion the name of the Azure region where you want to deploy your Azure Virtual Desktop environment -
Note: wait for the provisioning process to complete. This should take less than 1 minute.
-
Setting Value Region the name of the Azure region where you want to deploy your Azure Virtual Desktop environment VM image definition name <sName>-cpoF67-ImageDefinitionOS type Windows Security type Trusted launch supported OS state Generalized Publisher MicrosoftWindowsDesktop Offer Windows-11 SKU win11-23h2-avd-m365 Note: VM generation is automatically set to Gen2, because Gen 1 virtual machines are not supported with Trusted and Confidential security type.
-
Note: you should not create the VM image version at this stage. This will be done by Azure Virtual Desktop.
-
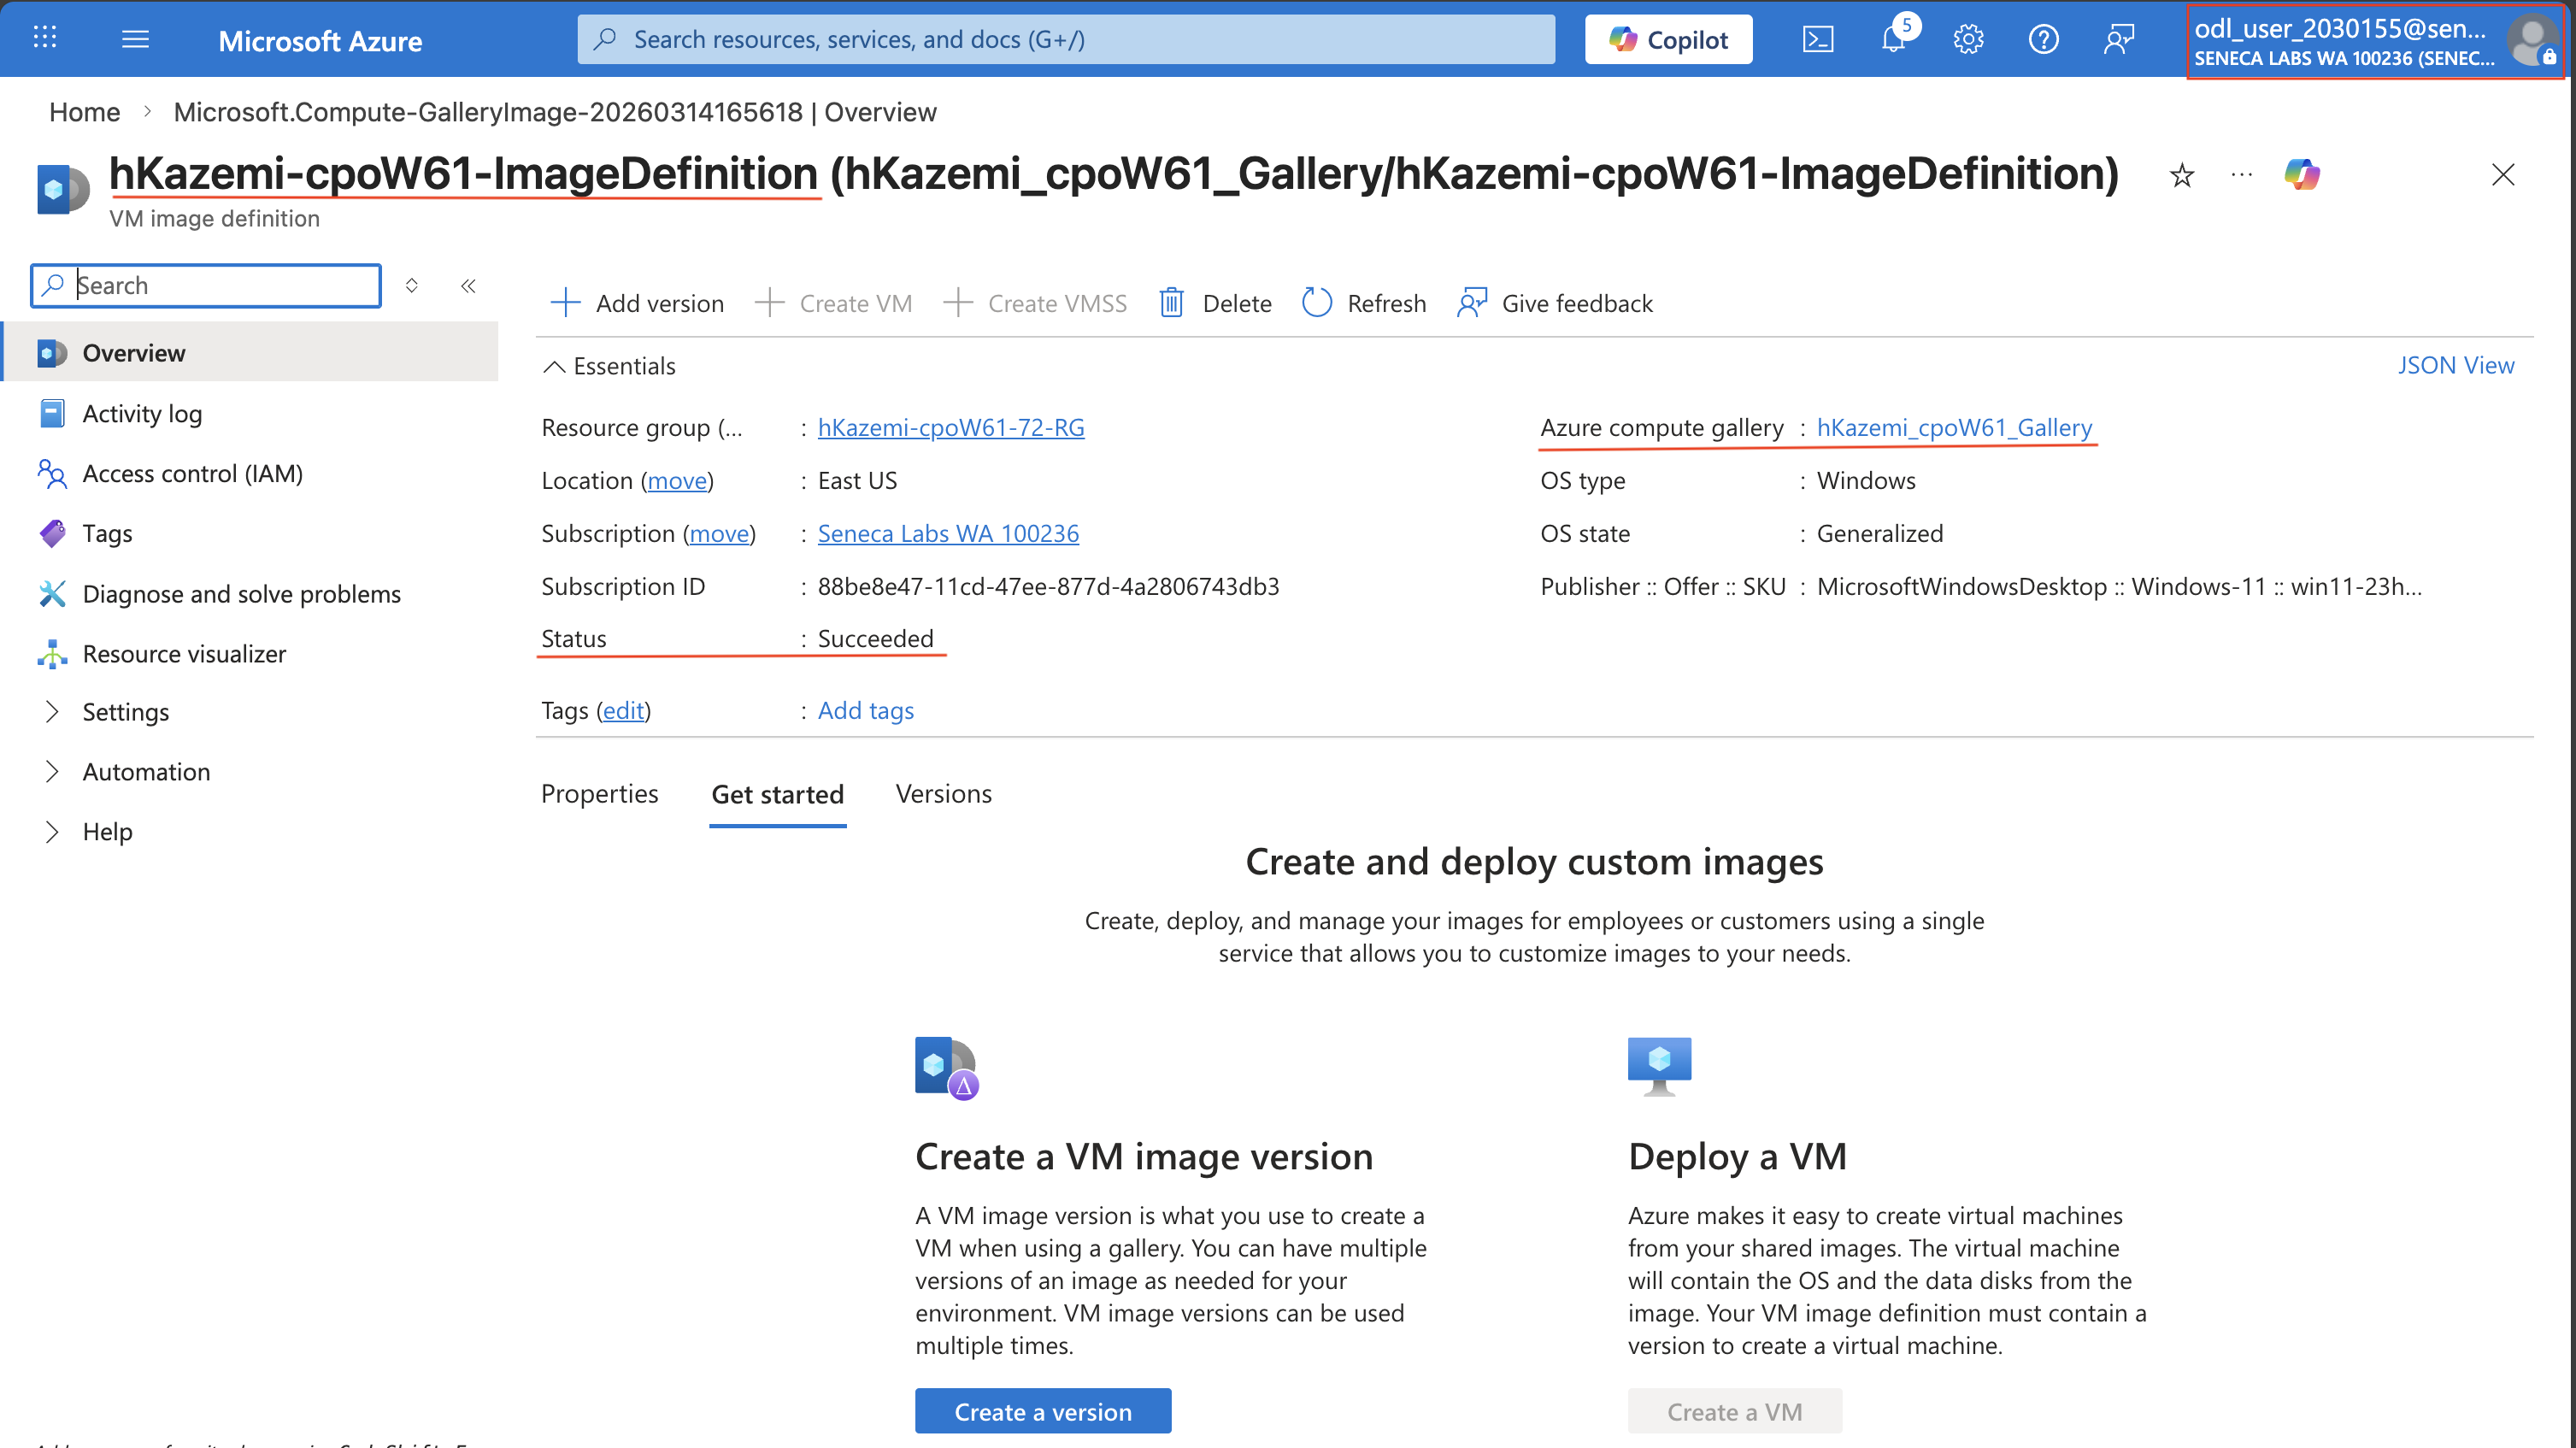
Setting Value Recommended VM vCPUs move slider to show 2 on the right side Recommended VM memory move slider to show 8 on the right side Excluded disk types select Premium SSD - Screenshot must show your Odl_user account, the <sName>-cpoF67-ImageDefinition created in <sName>_cpoF67_Gallery
Note: wait for the provisioning process to complete. This typically takes less than 1 minute.
Task 6: Create a custom image template 10 pts
-
Setting Value Template name <sName>-cpoF67-ImageTemplateImport from existing template No Subscription the name of the Azure subscription you are using in this lab Resource group <sName>-cpoF67-72-RGLocation the name of the Azure region where you want to deploy your Azure Virtual Desktop environment (East US) Managed identity <sName>-cpoF67-uami -
Setting Value Source type Platform image (marketplace) Select image Windows 11 Enterprise multi-session, Version 23H2 + Microsoft 365 Apps -
Setting Value Azure Compute Gallery enabled Gallery name <sName>_cpoF67_GalleryGallery image definition <sName>-cpoF67-ImageDefinitionGallery image version 1.0.0Run output name cpoF67-image-1.0.0Replication regions the name of the Azure region where you want to deploy your Azure Virtual Desktop environment Exclude from latest No Storage account type Standard_LRS Note: you can use the Replication regions property to accommodate multi-region builds. Setting Exclude from latest to Yes would prevent this image version from being used when
latestis specified as the version of theImageReferenceelement during VM creation. -
Setting Value Build timeout 120Build VM size Standard_D2s_v3OS disk size (GB) 127Staging group cpoF67-73-RGVNet leave not set Note: Staging group is the resource group used to stage resources to build the image and store logs. If you don't provide its name, it will be automatically generated. If the VNet name is not set, a temporary one is created, along with a public IP address for the VM used to create the build.
-
Note: you have the option of adding your own scripts. For examples, consider referencing the built-in scripts, such as Time zone redirection, Disable Storage Sense, or Enable screen capture protection.
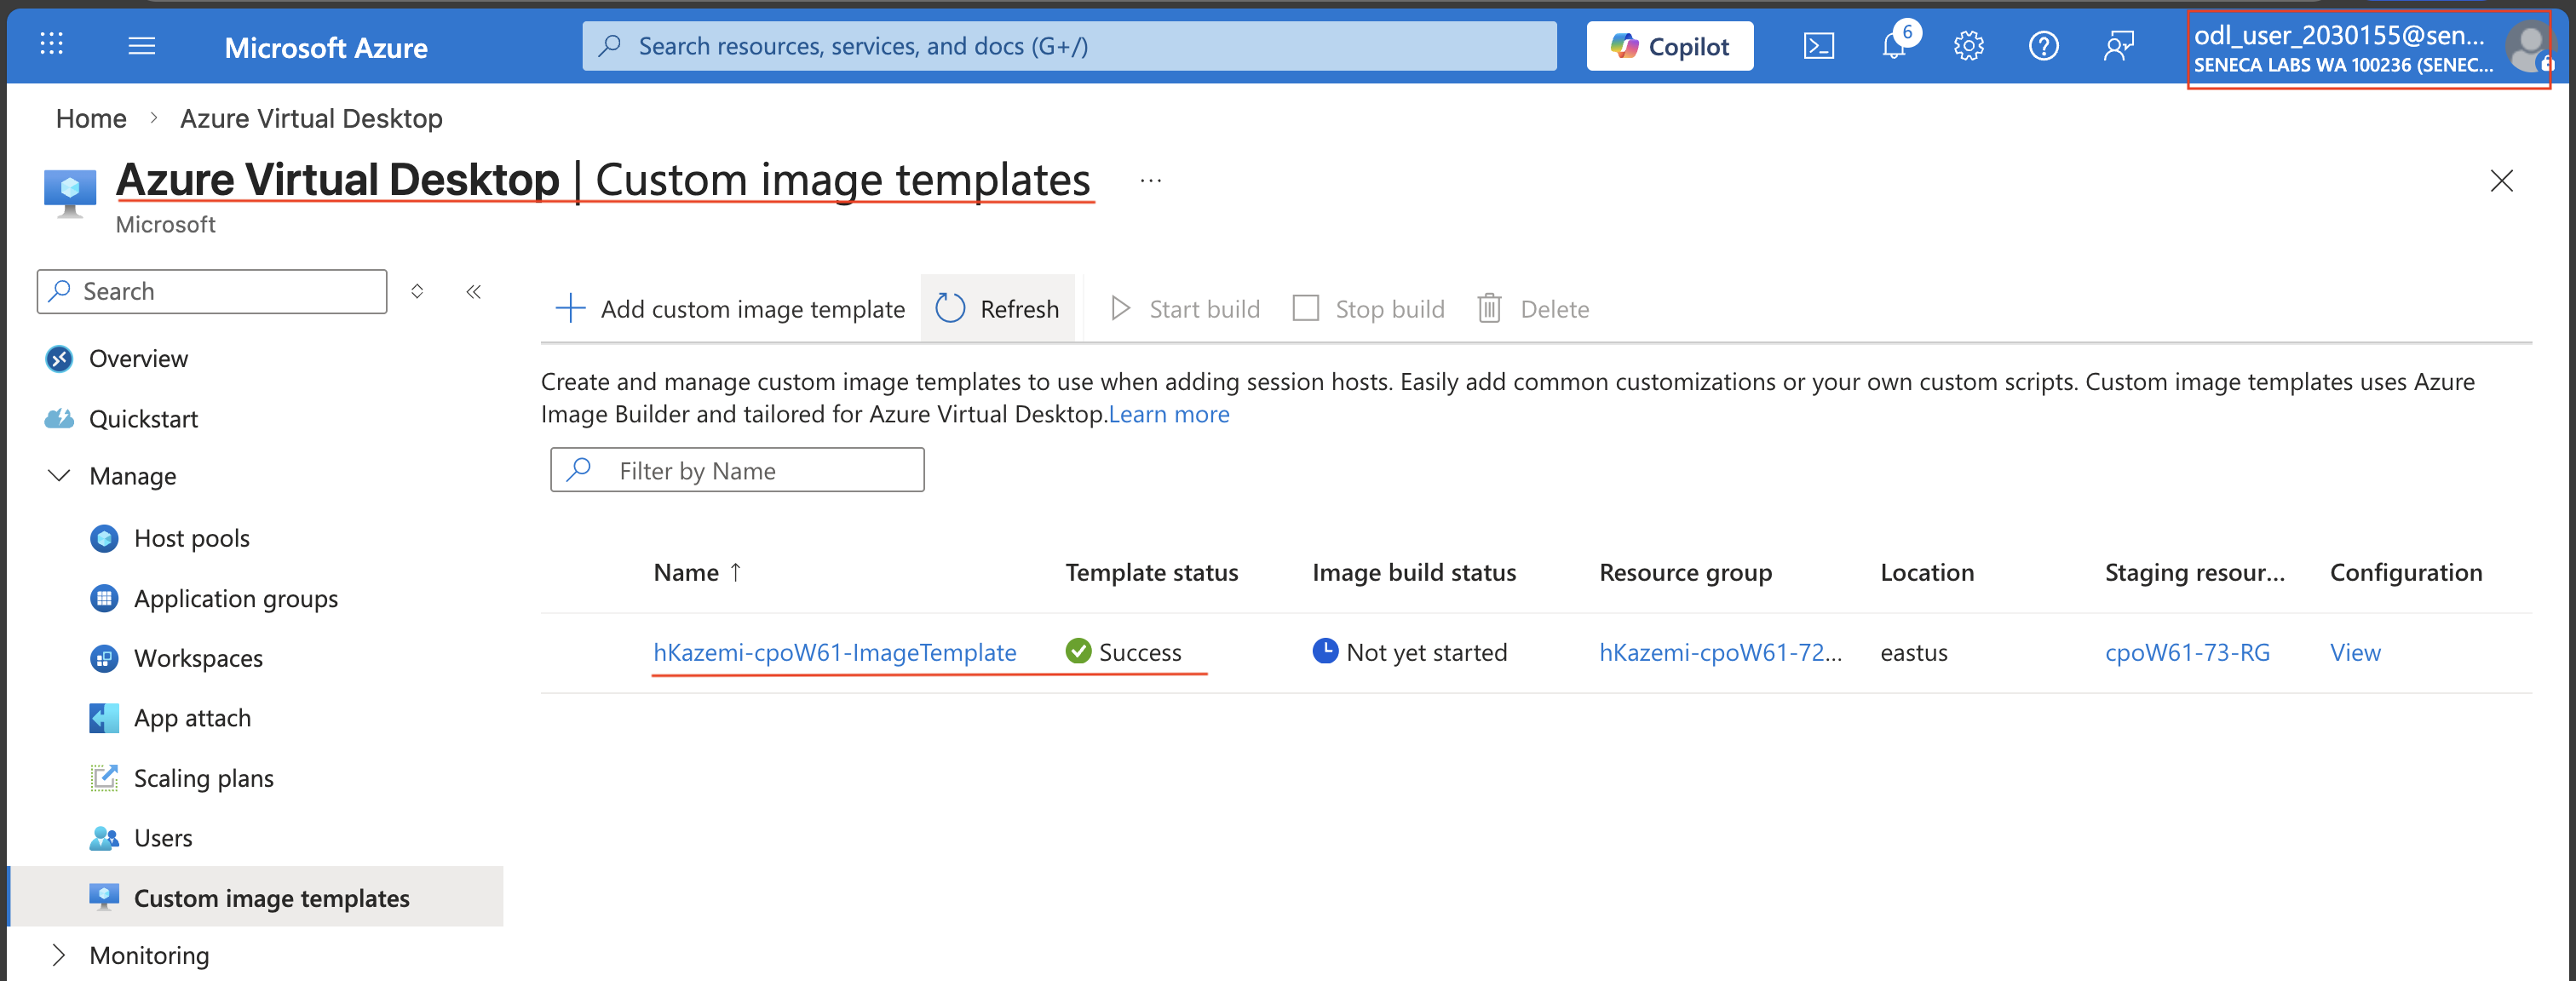
- Screenshot must show your Odl_user account, the <sName>-cpoF67-ImageTemplate in the Custom image templates list
Task 7: Build a custom image 10 pts
Note: the remaining tasks of this lab involve a fairly extensive wait time.
-
Note: the build run state should change at some point from Running - Building to Running - Distributing and finally to Succeeded.
-
Note: alternatively, you can use Activity Log to keep track of the completion of the build process. The action you should focus on is Execute a VM image template to produce its output. Its status should change at some point from Accepted to Succeeded.
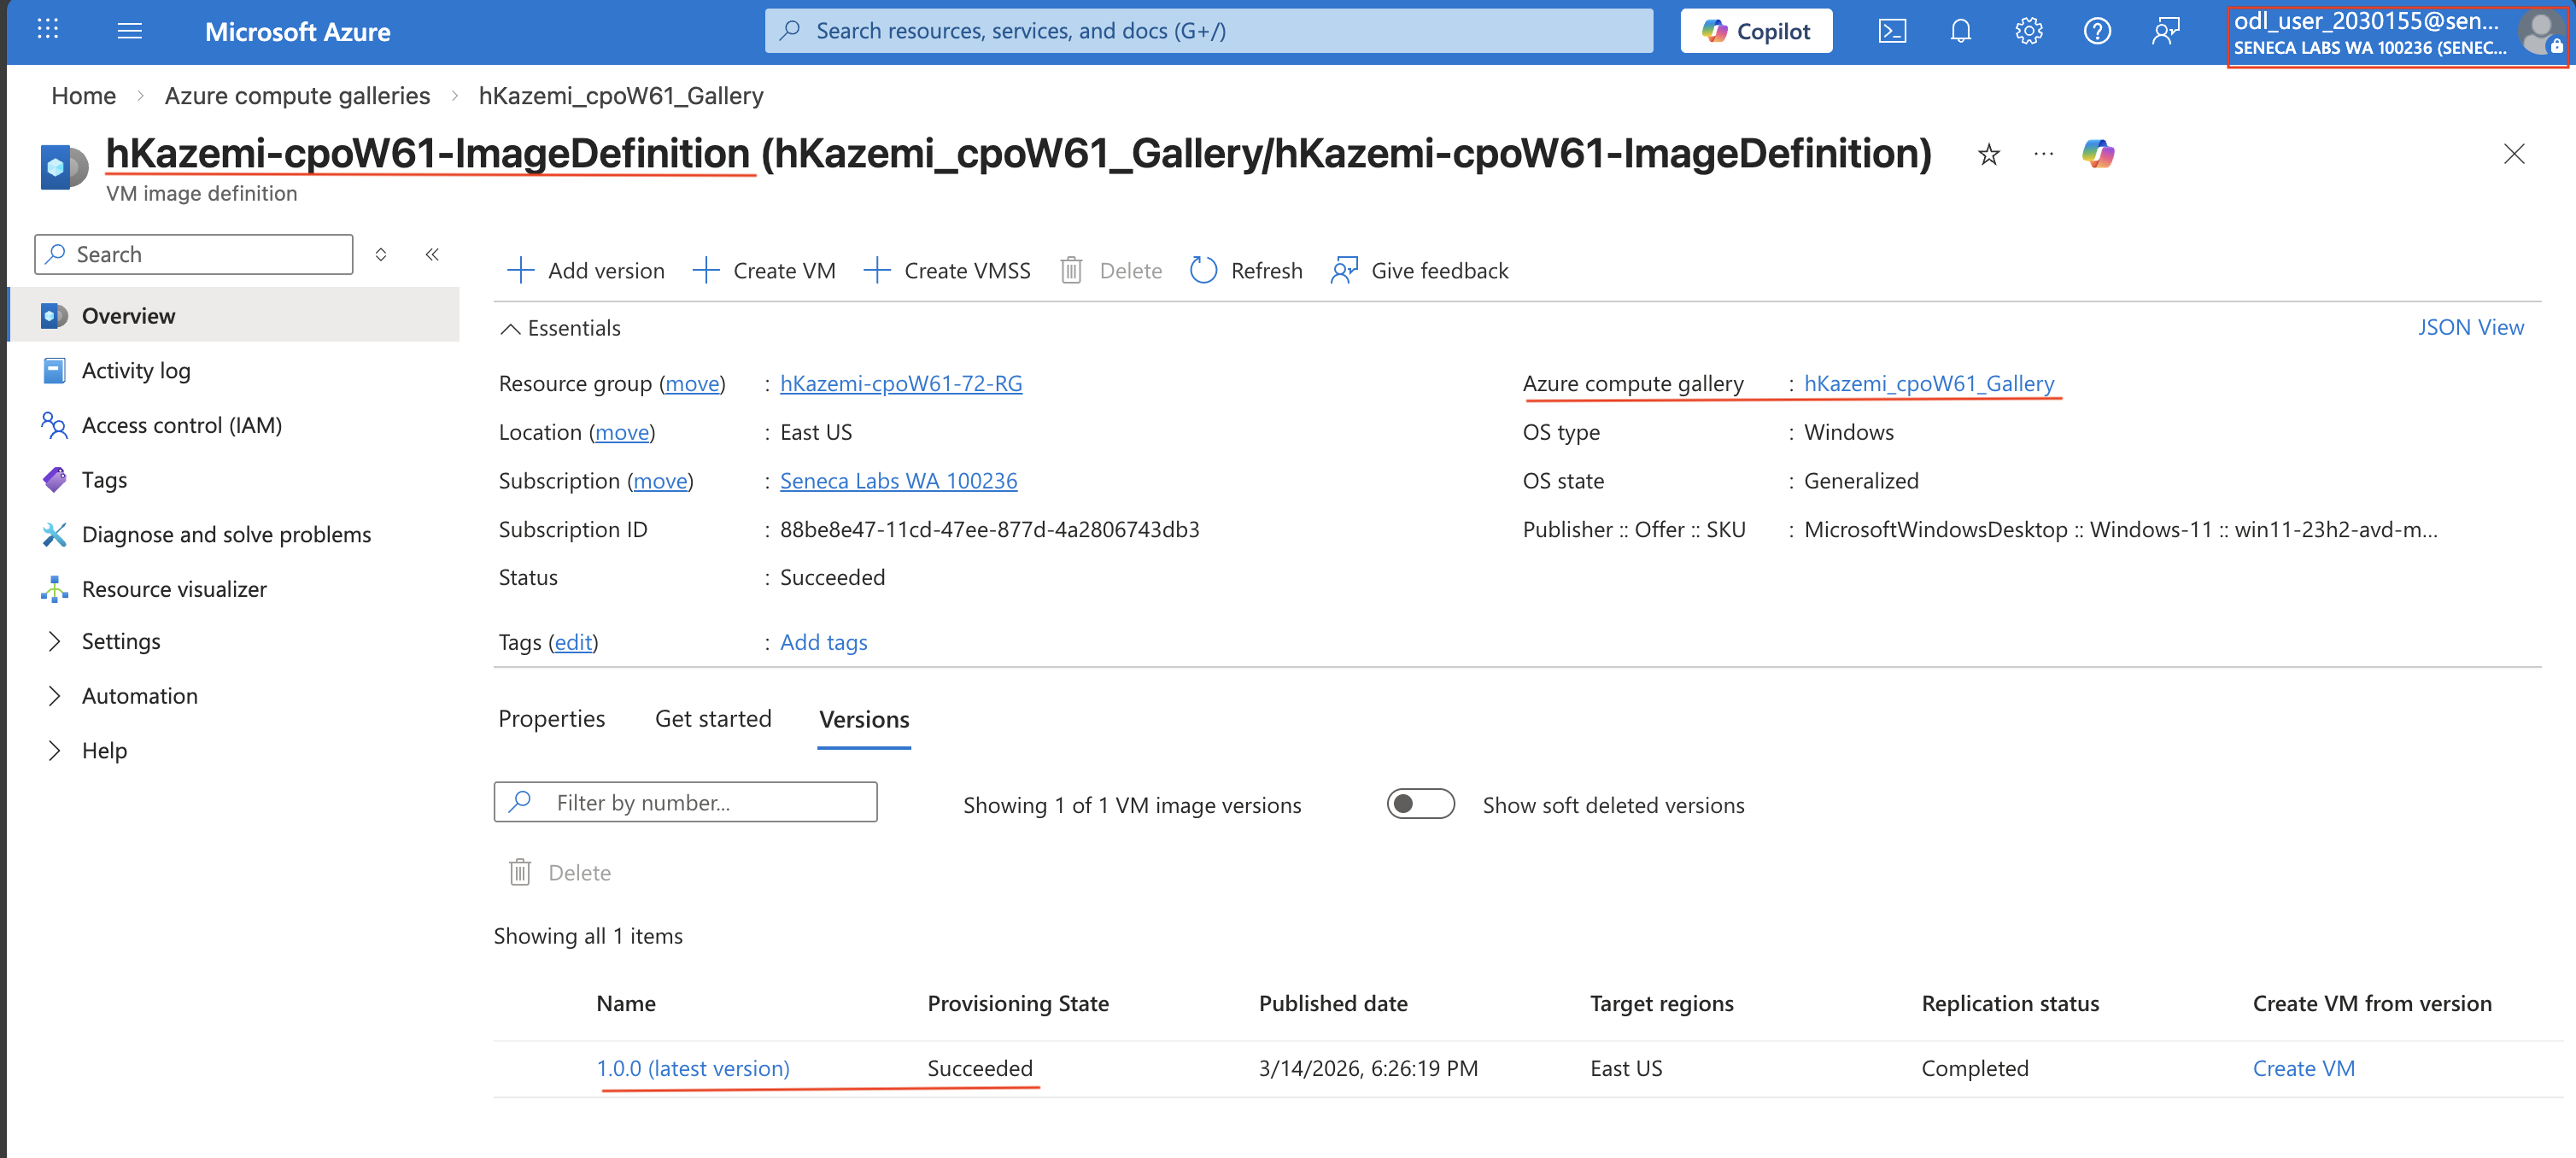
- Screenshot must show your Odl_user account, the <sName>-cpoF67-ImageDefinition with image version 1.0.0 in <sName>_cpoF67_Gallery
Task 8: Deploy session hosts by using a custom image 10 pts
Note: step through the initial stages of deploying Azure Virtual Desktop session hosts by using the custom image you created. Generate key when adding new session hosts.
-
Setting Value Add virtual machines Yes Resource group <sName>-cpoF67-21e-RGName prefix <sName>-imgVirtual machine type Azure virtual machine Virtual machine location the name of the Azure region where you want to deploy your Azure Virtual Desktop environment Availability options No infrastructure redundancy required Security type Trusted launch virtual machines -
Setting Value Image <sName>_cpoF67_Gallery/<sName>-cpoF67-ImageDefinition/1.0.0Virtual machine size Standard D2s_v3Number of VMs 1 OS disk type Standard HDD OS disk size Default size Boot Diagnostics Disabled Virtual network cpoF67-vnet11eSubnet hp1-SubnetNetwork security group Basic Public inbound ports No Select which directory you would like to join Microsoft Entra ID Enroll VM with Intune No User name AdminuserPassword provide a complex password Confirm password retype the password -
Note: wait for the deployment to complete. This might take about 10-15 minutes.
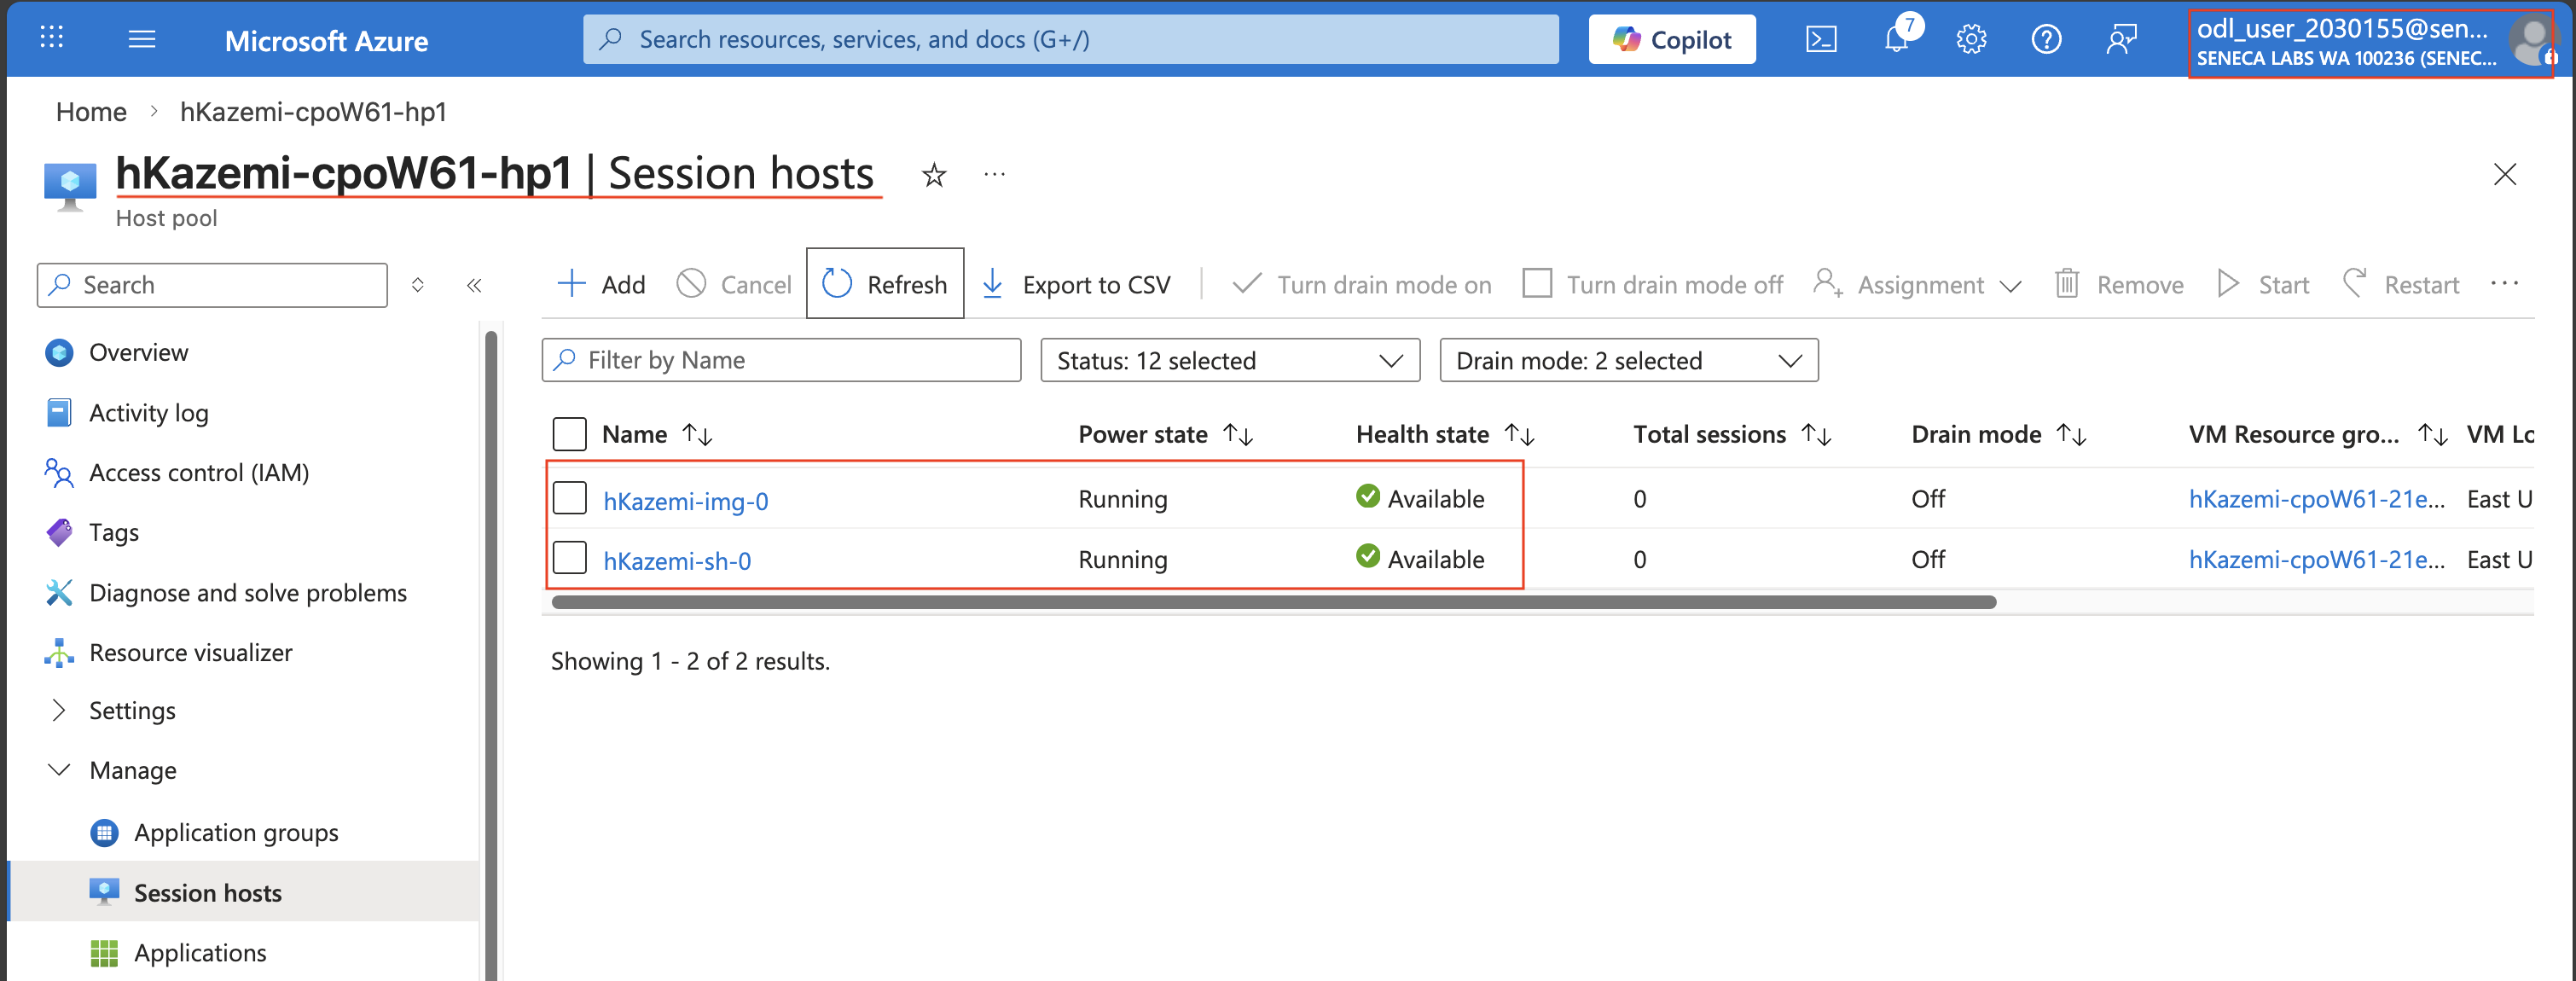
- Screenshot must show your Odl_user account, the session hosts <sName>-img deployed from the custom image with status Available
Task 9: Summary Questions 20 pts
Minimum 2-3 sentences each — original thinking, your own words!
Your submission preview
Screenshots you attach above and your Task 9 answers appear here. This is exactly what prints/exports as your PDF.
CPO550 Lab 07 - Create custom session host images by using image templates
Name: . Account: ·
Professor: Dr. Kazemi
Submit compile & export
Sample screenshots reference
These screenshots are just samples. Your screenshots may vary, but they should include similar details underlined.
Important Lab Cleanup Instructions
To minimize costs, stop all virtual machines (VMs) immediately. Restart them only when beginning the next lab. This will help ensure that no unnecessary resources remain running in your account.